Your Cart is Empty
Bead Loom Basics - How to use your Original Jewel Loom Bead Loom to make a Beaded Bracelet

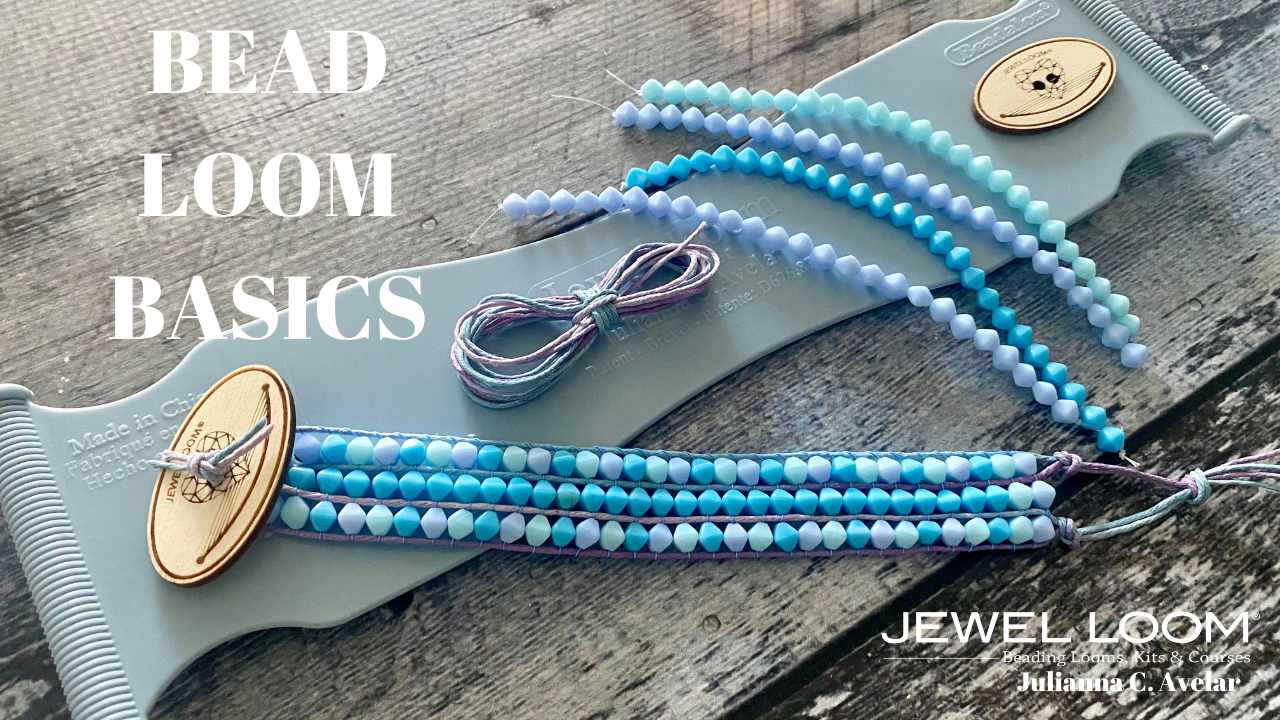
In this video Jewels shows you how to set up your Jewel Loom Bead Loom & weave.
- Starting with the insertion of the metal rod, including tips to flex (not bend) the loom
- Warping with cord (she uses Hemptique Hemp for the warps)
- Threading your Jewel Loom Needle with .006 Blue Wildfire Beading Thread
- Weaving in 6mm Fire Polish Beads
- Removing the finished bracelet from the loom
- Tying the warps together and adding a wood button clasp
She uses the Original Jewel Loom, Jewel Loom Needles, and the NEW Jewel Loom Branded Bead Kit
Watch the tutorial below
Links for products used in this project:
- Jewel Loom Branded Bead Kit: https://jewelloom.com/collections/patterns-how-to/products/jewel-loom-branded-bead-kit?aff=11
- Jewel Loom, Baby Loom, & accessories: https://jewelloom.com/collections/jewel-loom-original-baby?aff=11
- Jewel Loom Needles: https://jewelloom.com/collections/jewelry-making-buttons/beading-needles?aff=11
Subscribe to the Jewel Loom YouTube channel to access past & current tutorials: https://www.youtube.com/c/JewelLoom
Sign up for the Jewel Loom newsletter & get 15% off your first order, plus 3 new patterns for first time email subscribers: https://jewelloom.com/pages/save-15-and-get-free-friendship-bracelet-instructions
Join the Birthday club at www.jewelloom.com and receive Free Shipping on your order placed on Birthday.
Check out the Jewel Loom Blog for past & current tutorials, plus read details on project: https://jewelloom.com/blogs/craft-hangover
Follow Jewel Loom on Instagram:
Follow & like the Jewel Loom Facebook page: https://www.facebook.com/Jewelloom
We have a free group on Facebook full of inspiration, tips and techniques. It's a great community! You can join the Jewelry Making with Jewel Loom community page at the following link: https://www.facebook.com/groups/jewelloom/
Please contact Jewels with any questions you have about her looms: email -hello@jewelloom.com
Transcript:
welcome in everyone welcome to juwel loom School live it's April 11th Thursday what a
beautiful beautiful day and I am so excited I love when I get the
opportunity to go back to the basics and to talk about the original jewel
loom the blue one and to really break down
what it is how it's used and all of the different techniques that will come in
handy when you're especially when you're first starting out so if you're a firsttime bead Loomer it's always good
to know um some of the tips and tricks in order to have a successful project at
the end and of course you're going to be practicing practicing practicing and
that's okay um you know that's just what we do when when we're learning something
new like beating on a loom and so even if you have done off Loom work you're
definitely going to have a period of time where you're adjusting to the technique of actually being on the warps
on a loom so any who I hope everybody's doing really fabulous today again I'm
Juliana Avalar the inventor of the jewel loom Jewel lom's been out for gosh at
least 10 years now and uh can be found all over the world such a blessing such
a little blue blessing and so whether you're shopping online or at a big
retailer somewhere throughout the country or small Mom and Pop um we love
love love that you show the jewel loom so much love and the baby jewel loom and
those jewel loom needles are like hotter than fire right Joan Joan's in the
background and she's like um making sure that your questions are getting answered and so she'll throw them up on the
screen and I'll be able to help you out um and so yeah so we've got we've got
Queen Joan in the background and so you probably can see other looms that
are sitting over in this area so after I came out with the plastic blue loom I
did birth an entire line of sustainable Baltic birch wood Loom and accessories
and so those are very similar you know a warp is a warp and a weft is a we it
just depends on what type of loom you are on and what your
final expectation of your project may be how big you want it um and so like with
the large wisdom Warrior of course you can make really long pieces sunweaver makes really gorgeous mixed media pieces
and the original jewel loom makes super fabulous bracelets and so I
actually put a kit together for us today this is the jewel loom branded bead
kit and we took the logo for the jewel loom and we put it onto a button and so
I super love that and then all of these gorgeous colors of the lavenders and the blues really represent the jul Loom
brand and so I thought well how fun I had an opportunity to get these beads at a really great price and I was like I
will take them all first of all I will take them all and make a fabulous kit at a really
great price this is in the shop the button four strands of the check glass Beed fire polish um deliciousness this
color coating on these beads is just outstanding and two yards of the
hemptique hemp cord you know I love hemptique they've got sustained um hemp that they use and produce and
they're a small family owned business and so we we love that absolutely so
this is a kit and what I want to do today is really focus
on some of the details of the jewel loom so that again if you're a firsttime user
or you just need a refresher that you really understand how it works so the
jewel loom all right that's this tool in front of me that I'm holding up the
jewel loom is a very lightweight very very lightweight I mean if it's a couple
of ounces right like it's really lightweight and it's made out of a
flexible plastic not a bendable one all right so I think psychologically I need
you to get that through your head it's a flexible plastic not a bendable so
you're not going to be bending it in half um you know don't go chasing after the kids or anything wild like that you
want to really get a hold of that in your mind that it's flexible not
bendable all right now it also comes with a metal rod and that metal rod is
inserted into the holes now part of my patent part of my design Pat are the
buttons that you're going to find on the back and on the tops here and the bottom
and basically I did that in order to help save waste because a lot of looms
you're going around and around and around and around and then all of a sudden you have all of this super like
just a ton of wasted product and you know I don't know about
you but like I love my Wildfire and you know it it costs what it's worth and I
don't want to waste it so that's part of the US patent
d76 comma 879 879 if I ever get it to it will be my US
Patent but I gotta get over the fear of needles so okay so we have our jewel
loom and we have the metal rod you might see this packaged in different locations
it's got a cute new little plastic bag and I don't sell that one one but you
mostly can find that configuration at Hobby Lobby Michaels
some of the bigger Stores um and I do believe that it's online and I'm sure
beon actually has it but at JW loom.com I don't have that one so I have had
people say oh I got my loom and where's the bag the bag was in in the picture
that was you know in the jewel loom.com shop it's not the one I sell so if you're bad
crazy then you need to find that one and wherever you buy it from it's all good
love it's all good love so all right so we've got our jewel loom and I just want
to let's talk a little bit more about some of the other things um I will be
using Wildfire today I'm using the
point6 Beeton has come out with a 0.00 for it's called Ultra and I just got a
hold of some what I think it's going to be super great for are the loops especially when we're doing tiny seed
beads and we want to go back through them but we'll we'll cross that bridge
when that project needs that but today .006 wildfire and I'm using their
delicious blue why not jul and blue right so we got the wildfire and then I
don't know if you have tried the jewel loom needles obviously if you've bought
a starter kit for me I include a pack of them in the starter kit people buy the
jewel loom needles like seriously it's crazy we see these needles flying out
the door and we all kind of look at each other like what are they doing with
them like what because I know they're great for what we do but but I think
there's other categories that are using the needle and I think it's because it's so perfectly sized it's three inches I
personally cannot get my fingers around a traditional bead needle anymore I can't hold them because of all the wire
workking and beating I've done I just can't close my fingers anymore so so the
jewel loom needle works really super well and um it's hugely popular so we've
got our jeom needle we have our wildfire it's always great to have a good pair of um sharp scissors when you're beating I
love these robber and Karen gifted them to me I think it might have been last year and flat nose pliers so I use the
flatnose pliers to flatten the Wildfire before I tried
to thread it so the eye on the jewel loom needle is a little narrow and
so um flattening the end of the wild fly Wild Fire And
then trying to get it threaded to the needle is really the best way to do that and I'm going to show you that so we're
just kind of going through what I'm using but again um gorgeous bracelet super beautiful very very easy so if
you're new to beading and you just want to try it and you want to do something that's um not going to to cause like
this big huge investment then then it's got a perfect entry point you know you
can you can get a loom for like $13 I think it is and and uh the kits 15 and
knock your socks off so without further Ado the other thing I do want to once
again visit it's a flexible plastic it's got a shiny
bottom and it Wiggles it wiggles like it's mama that's what I always say it wiggles like it's mama so I've had
people who are like it moves yeah it's not a piece of wood it's a
piece of really lightweight plastic and it wiggles like it's mama so if that's something that you know you want to
solve we've got a jewel loom stand now um it fits perfectly into the stand it
can actually lay in the stand while you're working on it so it doesn't move
if you don't um have the stand yet definitely need to get one but in the
meantime you can work on a Surface like the bead mat you can put some painters
tape on this back side and stick it down you can uh work on the
shelfing um oh gosh I always forget the name of that I'm sure somebody in the group is going to list it you know how
when we line our shelves and it's got that nonskid kind of surface
that stuff okay but hey this is super reasonably priced and it's made for the
jeel loom and it actually stands up right too so I'll show you that okay so without further Ado what I want to get
into is inserting the metal rod okay so again
and I think I want to actually I think I actually want to stand for this because
I like the sh shot right here okay so I've got my
loom okay and this bottom hole is closest to
my body all right and I'm going to take the metal rod you see how it's sticking up right there it's doing that on both
ends and we're just going to place that into the bottom hole and then I swing it
up to the front and then what I'm going to do and I'm just going to use my belly
right there and it just snaps in okay so
if I were to come back and try to get it out and it wasn't budging do not force
it okay do not force it all right what you're gonna do I'm G so you're not like
okay what you're going to do is you're going to turn it and I don't know what magically
happens but It's Magic okay so like the tension
shifts but don't ever force it to come out again you're working with a flexible
plastic not a bendable plastic super lightweight it's got curves like its
Mama by the way I'm its mama okay so when I say it wiggles like me it wiggles like me and it's curvy all right so
don't ever Force the rod to come out um turn it around like I just did
okay pop it in and this is what it's going to look like this is what your loom should look like after you put the
metal rod in so it's got like this perfect you know indentation down here
it's in this warped State and it's ready for its warped threads so we're going to
go to the overhead because now we want to do that and I'm going to make sure my chair is in the right spot so I don't
fall and bust my butt all right
and do you want to bring me up
Joan so I don't mess it up okay cool beans there we go and you can hear me
okay I'm not sure that I got a did you say you could hear me
okay once in a while I'm hearing like a little like electrical sound if I hear
it again I'll let you know okay but you can hear me yeah okay cool all right
so I'm GNA turn the loom over and you can get rid of my shot Joan
if you want to as long as you can still hear me okay and I it's so funny I feel like
I'm just like completely sitting on top of myself here all right okay so what I'm going to
do now is I have turned the loom
over and I'm going to refer to this as like the front part or the let me see
because this is the back side of the Loom but but it's closest to my body all right so here's my finger and my body is
over here and so I'm going to
attach the hemptique hemp cord and I'm just going to
make wh I'm going to make a
little thought I was going to make a little knot I was going to make like a little n Loop right here just trying to
attach it to the back button and of course it wants to dance everywhere then I'm going to pull nice and tight and I
can do another um another knot
all right and so awesome okay now let me show you this
you see where these this knot was made okay you want that knot to follow you
and what I mean by that is you see how it's starting to tug a little and I pulled the hemp over to the side of my
loom I want that knot to be facing me because if the knots way back here and
you don't pull then you're going to have this tiny tiny little bit of material of
warp threads that are going to make your first warp knot taut enough so make sure
your knot is looking at you so then what I'm going to do is I've got
the hemp in my hand and I'm going to lay it down on the grid I'm going to flip
the loom over
[Music] and there we go and so I don't necessarily count how many grooves are I
skipped up on the top and make sure that they're the same on the bottom I can eyeball it and I can see and then I'm
going to bring my finger in and I can feel that
I've got this really nice and taut so I'm going to flip it over again and coming around that back button
make sure that you don't grab the rod by accident because that too is going to
really screw up your tension so make sure that the hemp cord is going around or the Wildfire or whatever warping
material you're working with make sure it's coming around that back button now
I'm working with a 6 millimeter bead so I'm going to want to skip three
grooves so looks like I'm pretty good and then I'll
flip it back back around and I'm going to bring it all the
way back up and let's just see for Giggles we got
one two three so I could actually scooch that over a little bit then I'm going to
flip it back and we're going to wrap around that
back button skip three whoop skip three
again and I could see I'm awful little so one two
three bring it back now I'm
making four warps because I am using three beads
across so we're going to keep doing this
motion okay so one two
three and now what we want to do is we'll take the hemp cord and we wrap it
around that back button a couple of times the cool thing is when you're working with a thick material like the
cord it locks itself into the wrap back here because it's so
thick it's like it's locking so you don't have that stress of like losing
your tension as much as you do sometimes with like say the beating thread like
the Wildfire so now I'm just going to
whoops going to make a
knot
okay and we'll just do that one more
time okay all right so I'm going to trim
this now um let me see really quick here I want
to get up a little bit higher let
me let me adjust because I want you to really
understand what's gonna what's happening
okay okay we're a one a one woman show
here and the one woman on each side of the screen okay let's see if that helps
so the metal rod comes out after you
create your warps all right you may have seen where people leave the metal rod in
the whole idea the whole concept of the jewel loom having the best warp the best
tension is that it all comes together when you remove the metal rod so I've
got my pointer finger up here and I've got a placed onto the warp
threads and what I'm going to do is very carefully and again if that's not going
to come out I don't force it I turn it
around let me stand up I gotta get I got to get the
right so we'll turn it around we never force it there we go so it'll pop
out and so you had to just kind of turn it a couple of times just to loosen up the the totness of the rod but you don't
ever ever want to force it I think um what you need to remember and I'll say
this a thousand times is that the plastic is flexible so you never want to
add any stress to it so this is gorgeous
look it perfect perfect warp so what I do want
to show you next is that and hopefully this is a good
visual all right so I'm tilting the loom forward because I want to show you so
here's here's its belly right and this part of the Loom is facing up to the
ceiling and here's the warps so the distance between the
warps and this Bend in the jewel loom should not be
more than 2 in this is a good 2 in
okay and so it's really important to take
note of that because I've seen some looms that are way too tight and you
have got a lot more distance than the 2 in and you're
stressing your jewel loom okay okay so practice with that I would say that
learning how to do your warps and getting the perfect tension just takes
time you just got to practice play around with different materials and don't be so hard on yourself you're
learning something new and again two
inches okay so I are there any questions
about any of that so far I haven't seen anything come up I did see um Maria yes to your point if you're
using a stretchy type of material like leather or say you take an old pair of
denim pants and you shred them or you take an old cotton shirt and you shred
it or even if you use some Sor ribbon things that have no oomph
right um yeah you could definitely leave your rod in because it's is going to help
to you know keep the um totness of your warps with that type of material so yeah
good good point Maria thank you now with the Jew lium needle as I mentioned
earlier now I had two needles what's going on here do we got a needle down I
think we might have a needle down hold on needle down where did it go
definitely got to find the Neil because we don't want Marlon Brando to
uh it's kind of like the missing sock in the dryer right where where did the
missing sock go okay well we're just not going to definitely let the dog in okay
so what I am going to do though is and it'll work out perfectly so I've got a
needle and I'm using using about two yards of the um blue Wildfire by Beeton
it is my favorite to work with very sturdy and exactly what you
need okay so I've cut a piece off and now what I want to do is I want
to bring my flat nose pliers in and I'm
just flattening the end that's going to go into the jewel loom
needle okay and it just makes life a lot easier
when you're trying to thread um that eye because it can be a little
small this needle that is just so funny where is my needle
at I got everything right here okay so let's just see if I'm going to be able
to do this I'm gonna have to stand up again so I can look
down so I pinch it in between let me get my fingers in
the looks like we have a little bit of a a
delay and
hopefully this is why I had one ready to go oh my
heck nope okay hold that
thought that is so strange Joan I didn't have it when we were talking
right that's so funny the needle
goblins all right so just bringing in a different needle right now I'm sure it's
on the ground
somewhere it's why we always do our
needles the pressure is on
I'm going to go over to the light hold
on I can hear everybody screaming in the background there we go thank you thank
you thank you okay all righty and we probably needed
that light anyway so okay so now we're ready to add our
beads we got our needle all dialed in and our wildfire and so some people start their
projects with a little side knot on the side warp and others don't Maria doesn't
do any knots and um I just basically
do one little
one little knot to get started and then I use my Wildfire burner to secure it my
goodness come on now okay so the first bracelet that I made I use
all of the beads because I wanted you to know how big of a bracelet you can make
from the kit and so this is going to allow for just about eight8 and 1 half
inches for a wrist it's pretty long and so when you're putting when you're building your piece on the jewel loom
you really want to center it so that you have enough
warps on each end in order to come back and tie and make your
Loop and tie and add your button okay so I'm going to Center my project and
usually it's right below that top hole
and my needle and thread okay my needle and thread are in my left hand the jewel loom is in front
of me and this is my right hand and so I'm going to bring the needle and thread
under the warps transfer it to my right hand and then I'm going to pick up three
beads and I'm going to scooch these over so you can see how pretty they are this lavender one all of them killed me that
coating is just magnificent so we're going to pick up
one two three and then I'm just going to help
guide them because I've got a lot of wildfire in fact I'm going to scooch everything
over and I'm just guiding the Wildfire so that it doesn't get tangled or caught
on anything and so right now the beads are hanging under the warps I'm going to
take my pointer and my hand and I just help to guide them up and in between the
warp threads okay and then I'm taking the needle and I'm going back through the
beads and because we're using the 1 mm hemp it's a very tight pass through you
just have to be slow and patient all right and then I'll transfer my hand and
I hold it down and again I'm just very careful taking
my time pulling the wildfire and then when I get to this spot right here I can see that this
little guy kind of jumped out so I'm just going to help him get back in and there he
goes and there's our first row okay then we're going to do the same thing again
we come under the warps transfer it over to my right hand and then I'm just going
to reverse the pattern so I'll pick up a pretty light blue I'm
going to keep all my lavenders in the middle and a little bit of a darker
blue again I'm just going to help guide these all the way down to the
bottom they're going to pop up in between the warps I'm going back through
the beads and my needle is on top of the cord you can see that the needle doesn't
want to go straight across and we're not going to struggle with that we're if it needs to come in at an angle we're going
to let it have the freedom to do so and then we'll straighten it out when we get all the way pulled through it'll just
make life easier whoops so just continue there and then
we scooch that up pull that a little bit so you always want to make sure that you pull just enough that not your Wildfire
is not leaving like a loop because that's a total pain in the end you can't
really fix it so you're just going to pull come back under this time I'm going
to do three lavenders I'm not working off of a specific pattern I'm just doing
what I want to do so um these beads may speak to you in a different way and you
lay them out differently by the way I had four be s
left after I made that uh long bracelet and I made earrings and I'm
actually wearing them so I'll have to remember to show them to you when I get done here so again we're just going to make
sure everything is nice and help guide that little bit of wildfire and then we'll go
back to the dark blue
and the lavender this powder blue is really
really
pretty yeah when you work with a long piece of wildfire it's just like it wants to attach itself to all the
corners and all the edges and so you just have to be really careful and help to guide
it by all means you could split this um these beads up and and you could just do
two rows and then you probably could get I don't know I didn't try it so I'm not
going to say you could get two bracelets but you'd have extra beads so you probably could
try Okay and then we're going to pick up
lavender or wait no we're gonna we went blue
Lavender Blue and now we're going to do blue getting ahead of
myself so the excuse me this type of a
bracelet will go really fast you could you should be able to get to the point where you can whip one of these up um
with than an hour okay so we got another row that
wants to go in more at an angle so I'm not going to force it I'm just going to let it go up and then I'll straighten it
out but hopefully you're watching my hands to how I kind of maneuver with you know putting pressure in the middle of
the Loom and lifting and moving it's kind of
a little dance that we do and then we're going to go back to three left
lavenders so all of the kits have four strands of the beads um they're a
different combination of how many strands of the colors you get like this
one had two lavenders a light blue and a darker blue the first one over there had
two darker Blues a lavender and a light blue so we had to spread the love
amongst all of the kits um they're all G gorgeous they're all a combination of the colors that you
see okay so are we nice and straight got to look up here perfect
okay and then we'll go back to the blue
and
lavender [Music]
and we're going to take the needle going back through you can see how it gets a little easier after you come down a few
rows there's it's not as tight as that first row or maybe even the second one
start to get a little more flexibility but the 1 mm hemp is is
quite substantial and I I love working with it so blue
[Music]
lavender so I'm going to make this one so that it fits me I have a 6inch
rest and I believe for me it's like I think it's 25 Rose we'll have to
see so yeah I just want to encourage you to definitely practice your warps
practice really understanding um you know how the loom feels the weight of
the Loom the bend of the Loom and really not um you know just being really
careful with the insertion of the metal rod and the removal of
it and not ever forcing
it so I don't see any um specific spefic
questions the hardest part is just finding these little holes sometimes it's like where are
you there we
are it's so pretty it looks like candy it's going to be the perfect summer um
spring spring summer oh this would be a great um Mama day
bracelet I was just thinking that that'd be really
pretty and so where are we at we're going to go
back [Music]
oh we got a
barker that's the the one video out there where the dog they say the dogs
saved the human from the UPS man FedEx man the mailman the delivery man it's
like I think about that every time Marlon Brando barks it's like
dude beating and dogs
right
oops so again just making notes see how this one wants to go in at angle so
don't fight it just let it go that way and then guide all the wildfire
up and then you can scooch it and make it right
[Music]
so you could use a lighter weight hemp te hemp cord they do have
5.5 this is a 1 Point millimeter um the five the0 five is
definitely thinner and I just really prefer the
one because it um I don't know just for the bracelets I feel like it's so much
more sturdy but then a lot of people prefer the five and they're happy and so
you know you probably are going to have to um play around with the two different
sizes and see perhaps what works for you I also like the one because when I'm
using the technique of adding a wood button it's just more sturdy to thread
through so that I appreciate and um and again this
is the hemptique hemp cord that we love so
much I don't know if this one I don't think this one is called mermaid I think this one is maybe called unicorn I don't
know what's the difference isn't a mermaid unicorn similar similar color palettes
but I do I I think this one might be called
unicorn you know the problem is that they're all beautiful especially the variegated hemp cords oh my gosh I could
just I could just have a closet full of
those okay so I'm just making sure I'm not pulling too
tight and let's go pretty quickly here
and again this isn't a particular pattern it's just a hey I've got you know three different colors and how am I
going to spread the love on this one and so I'm just making it simple but I think
it's really
pretty yeah this one really wants to go at at an
angle it's also like cupcakes right this kind of reminds me of cupcakes I never have a
sweet tooth and I got to tell you over the last couple of days I've had one and what is that all about I'm definitely
not pregnant
so like where's that sweet tooth coming from I'm usually the salt girl like give
me a bag of chips you know Blue Chips I'm a blue chip girl
all right so going back through always making sure that the needle is on top of the warps when you're going back through
you can see the shininess of it if you're not on top of the warps
basically what happens is right here in this moment a bead would drop and that's
no fun so you always want to make sure that you're on top of the warps when you're going back
through
one of the things to consider as well even though we're kind of I guess I
think it would be fair to say in most parts of the country where we're coming
out of winter but I will say and Joan and I have both experienced this that
when the loom gets really cold believe it or not you need to warm it up like we'll literally if it's been in our
studio and the studio gets really cold or what have you we'll like literally warm up
the loom with our hands just to I don't know what the right word
would be to warm it
up and uh it definitely helps so we've got a lot of
our our bracelet almost done here you know again when you're not trying to talk talk and uh video something uh
you're going to get this done very quickly it's a really easy type of bracelet to
make
and Jan's giggling I don't know why
might be a conversation for
later so I would definitely say you know if you're a beginner on the loom um I
feel like this size bead if you're you
know I don't know if you want something super super easy but then I'm also a super fan of
you know working with the sea beads so I think it's going to be a personal
preference what you want to start with
um but I think once you really
understand the ways of the Jew Loom uh that you will have a really great
experience okay so I still think we have some few more rows to go for my size
bracelet as I said I used all the beads but four of them and that bracelet
length is more than likely going to accommodate a person with up to an eight
maybe an eight and a quarter inch wrist oops y there we
go and you can kind of see I'm just like really just flowing with that
bead hole there I'm not fussing with it I'm just really
letting it be its own bead and then we're going to
go back here they look like little pyramids too
it's like the little unicorn mermaid
house yeah so the other thing too that I want to point
out let me just see here I'm being really careful not to put my needle through the hemp cord because oi that is
a pain in the tush you don't want to go through you know the cord um so you got
to be really careful and you know just kind of every once in a while slow down
and really make sure that your needle's not going to go through the cord because then basically you've sewed yourself
onto your warps and you're not going to be able to move not
exactly what we want right so let me see where we're at with
sizing I'm going to go ahead and get my needle
through another reason why if the beads want to go in an angle I let them
because I'd rather not accidentally put my needle through the
the hemp cord so let's see what we've got going on here let me bring
this um okay so I definitely got just a
couple more rows so where do we we're on the
blues so [Music] blue
[Music] lavender
you do gain some length um with your button and the loop and
so you know you can go a little bit shorter I think I'm going to do one more
row and then I'm going to count to see what I got going on
here
oh and there the scratching goes sorry buddy but we got a missing
needle so we got to find the needle before those little Peepaw come in here because that will not be fun let me
scooch this up for you okay so I've got one two three four five six 7 8 9 10 11
12 13 14 15 16 17 18 19 20 21 22 23 24
25 26 so actually got one more row than I would probably normally do um what I'm
going to do next is I like coming under the warps on that last
row and I try it's a little hard with the with the 1 millimeter but like to get under if I
can it just helps to lock in that last
you could do it on the first row too so and then I'll just go back
through okay all right and then what I'm going to do is I'm going to come
up I think I got to turn myself here I'm G to come up and out and in
between that first bead and that second
bead okay and then I'm going to grab the
warp and I do this just to kind of hide my
knot so you can't even see it and then I'm going to take the needle
and I'm pushing the needle back so that it's pull that to the back here okay
cool and let's see get my scissors and I'll come back in with with
the Wildfire burner in we'll take care of that and I just
feel like I want to maybe let's see if I can get my cold
fingers I love the flat nose um because they just act like that extra hand that
sometimes you need there we go and I'll do the same
thing with that I'll get the Wildfire burner and make a little thingy
there scooch everything over so for my size bracelet for a 6inch wrist I mean
we still got all these beads look at this we still have lots and then if you only did two rows you know you could
probably do like a cool long single strand so don't be afraid to like lay your beads out and see maybe you know
what you can do um with the extras if you do have extra or if you don't want to go three across so I'm just going to
get these um let's see actually we'll just scooch this guy
over and come over here and very carefully so
I like to hold the glass beads in my hand and then I'll come over here and
sandwich the loom so I've kind of like got this whole thing going on we part of
the bracelets in my palm I've got my pointer up here I've got my thumb and
the whole reason is that when I cut the warps it's going to expand and I don't want the glass beads to hit the table
and then we don't want breakage so so just going to be careful here
whoa okay I'm gonna get that out of the way
and it looks I try to I try to leave the longest part
for the bottom end where I'm going to do the loop and then I'll use the shorter
warps for the button okay so what I'm going to do
though first is I'm going to take these two warps swing them
around and I just want to make a knot and I go pretty slow just because I want to get it as close to that bead as I can
so I'll just walk it down sometimes I'll just pull one warp very
carefully pull pull the other one because what you also don't want to
do is you don't want to shift the warps okay
we'll grab this come
[Music] around and again just being careful that
I'm not pulling too tight so I'll just like grab one of the warps and tug
it there we go nice I love when you can actually feel it's almost like you can feel and hear the success of what you
were trying to do okay so so um yeah this is my
top the only reason why I know this is my top is because I just saw my little wild fire string that I'm going to need
to um to use the burner on and so I'm just going to take let's see are we in
the right spot yeah take and put the two warps through the holes here
and I'll just do you know kind of semise secure
because I don't know if there's any adjustments that need to be made so I I'll do like my first
one you know and then come in carefully with my second knot and I don't trim
anything until I know for sure that I've got my sizing
correct okay and then on this end I'll go ahead head
and cut the loops there and I'm going to do the same exact thing so I'm taking
these and again I'm just carefully walking them down with my
fingers and we'll just pull ever so
gently and we're going to do it over here to this side okay
and you can kind of see where you need to pull and okay I feel like I got to get this
guy down a little bit closer to the bead I don't want it to be so uneven so let's
just see yeah awesome that helped so just go slow you know
that's that's my main message there and then what I'll do is I'll put it on my
wrist so pretty okay and then I'll bring the button around and then I'll just
scooch these around the button and kind of eyeballing like well
how big does that Loop need to be right so I've got my fingers pinched back here
I'm like that's pretty good so then I'll just carefully get out of
this and then you know pinch this together and I think that's about right
and what you can do from here is if you have enough length you can do that same
type of knot just want to get all these guys
through and I don't want that to be too big or too
small if that's ever a challenge for you you could always just pinch all those
together and get some wire and do like a wired coil I've done that as well so there we go let's see let's
see oh my heck awesome sauce so now I feel like the the fit is great I'm going
to go back and I'm going to trim all those Tails but look at how beautiful oh
my gosh these beads are just to die for anytime your bead has like a a
coating on it it's you know you're getting like a really
good good cool bead that's like not going to be out there every where so I do want to um I feel like I might have
needed to get a little tighter there
so so I'm G to leave that there for now and so hold on one quick second so I can
come back up Joan do you want to bring me back
up so yeah that sounded very Canadian
I love that I made a bracelet and I went to Canada but I'm still in
California so I'm just going to turn on the
um comments holy guacamole there's a lot of comments this can be quick make in
under an hour absolutely and jeles has kits yes she does she does yeah so um
this was the one I made last night and again this length you know what where's
the tape measure let me get the sewing this is a sewing tape measure so if I were to
Nestle this right up to the button okay so this is using all the
beads but four
again I feel like if you have an 8 in wrist with Loop you should be able
to that should fit you so this is seven and then the loop makes like another
inch so so you should be able to get like a good 8 inch depending on how you like to wear
it everybody likes to wear their bracelet different right and then I've
got a six in wrist and this one if we do the same
thing we've got but yeah so see this would actually go
up to like seven so this is going to be a little loose on my arm which is fine sometimes if I find that the bracelet is
a little more loose than I like I will wear multiple bracelets cuz why
not so yeah and how
funny come on now come on now my ring that I made last
THS and my new bracelet who's going out
tonight look it it matches so the total eclipse ring that I made the other day
and the juwel loom branded bracelet this is my model
pose yay I hope that helps I hope that um I just want to encourage you anytime
you're trying something new you've got a new tool you just need to go easy on yourself and you just need to
practice and um you know Maria is a huge Jewel original jewel loom lover she
she's been using the jeel loom for a long time a lot of people in the group have been using the original jewel loom
you just have to understand those simple details I think
that I shared with you it's extremely lightweight okay it's made out of a
flexible plastic and I don't ever want you to fight with the metal rod okay don't ever
fight putting it in don't ever fight with taking it out shift that tension
turn the loom and breathe just breathe he can I
add something I can't remember if you mentioned this before that if the Rod's a little tight that yeah um you know
about bending one tiny bit at one yeah we haven't had that issue in a long time
knock on wood but if you were to ever notice that the ends of your Rod were
maybe just like to pointed in you could use your flat nose pliers
and just ever so slightly like seriously you're just going to be like well that didn't really do
anything but just the slightest little might be what it needed what it
needs I feel like the Factory's been doing a thousand times better on that so
but it is another little tip but regardless don't ever like I
said don't fight with your Rod be one with it okay I really hope
that this helped and I'm just so excited for all of you that
are just starting it's so fun to see you it's so fun to see you in the group and
I think it's absolutely fine to start with beads that are possibly not all the
same shapes like if you got a jam and deal on something and you just want to practice do that do you know that when I
first started we were warping with fishing line I didn't have wildfire in my life
we were warping with fishing line I still have pieces that are made from fishing line I'll have to show them to
you next time so don't stress about making a masterpiece
on your first go get the technique down really understand your jewel loom make
it your besty and just practice the warp and you
know just don't don't stress about it because weaving is a beautiful
meditative soulful gorgeous magical dance and I want you to
have fun with it and you know just don't don't take it all don't take yourself so seriously somebody said that to me today
not about me but she could have because I love her but but sometimes right we just like
it's so old don't do that I have several original looms and have never had any
issues with putting in or taking out yeah awesome Lori good stuff good stuff
and look it's magical it's magical jul lom's over here going hey you're talking about me I can't you and here I am
because I did not put that screen up there we go there we go yeah so original
jewel loom um if you're thinking about getting started and your question is
like well where do where do I start Jules look at got all these deliciousness behind you if you've never
Beed on a loom I would be as bold to even say the
baby Julie which is half the size which is already warped you don't have to deal with the metal rod it makes smaller
projects but it's a great starter Loom if you're like no I want to make a
bracelet JW Loom all day and I want you to watch this video over and over again I want you to join the free Facebook
group I want you to go julum school.com and get the free videos over
there and everyone in the group is like they're I'm telling you we're blessed
the Facebook group the jwm community we are so blessed with some incredible people everybody helps
each other so super good stuff hi Robin and Lori and Zach and I know I think I
saw carollyn in here I really was focused on this tutorial so I was not
watching your chatter I really wanted to be focused and and really give you all I
got so oh hi Nilda I I went to school with anilda
that's so interesting line is that how you say your name line
that's really beautiful that's like reminds me of just having been in in New Orleans that sounds very Louisiana I
love it and Jenny good okay yeah that's what we're here for we want you to have a great time we don't want I don't want
you to buy products and then you're just like you're not happy like that's silly
so just do your best and uh and we'll go from there so thank you very very much
refer to this video as often as you need to and um ask me any questions that you
might have you can email me at jsj loom.com
and uh or ask questions in the group because there's a lot of really cool people in the group and they just help
so yes till we meet again all right thank you all so very much and Oh Hey
listen next Thursday I'm going to be flying to Texas for the bellacon event
and so I do believe um the the Queen Mother Joan is going to have something
for you in a what we would refer to as a recorded live um the following Thursday I'm super
stoked I'm actually GNA be in Vegas for a big YouTube convention and so that's
going to be a lot of fun if I can figure out a way to go live um even if it's
just like hey look at this really cool place or I don't know and Tiffany
Windsor's going to be with me elan's daughter from creative living she's
going to be with me you know what I think maybe we should try maybe it won't
be at four o'clock Pacific Standard time because we might be still learning but we might be able to do
something so just know next Thursday Jones got the control we'll play it by a
what happens on that last Thursday of the month I love you I appreciate you thank you you everyone see you
again